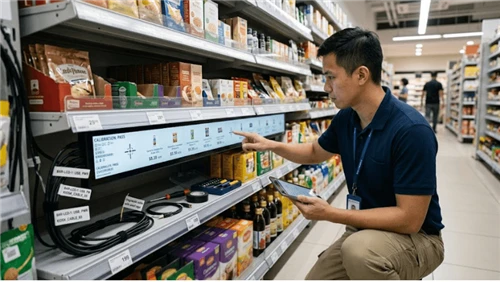
A commercial LCD VESA mounting decision can look like a small mechanical or maintenance detail until the display or kiosk is installed in a real store. The production system is a chain of materials, electronics, enclosure geometry, service procedures, and field conditions. A change at one point can appear somewhere else as an optical defect, thermal fault, intermittent reset, nuisance alarm, or premature service visit. For B2B projects, the useful question is therefore not whether a component exists, but whether the complete configuration has a defined design intent and evidence that it behaves predictably.
This guide treats commercial LCD VESA mounting as an engineering and procurement topic. It shows how to map the relevant system, separate failure mechanisms, define controls before tooling or rollout, collect evidence during validation, and turn the result into an RFQ and acceptance plan. Capabilities vary by model, controller, enclosure, material stack, firmware, and destination environment, so project teams should verify the exact proposed configuration instead of borrowing an unsupported number from another product.

This guide is for finished commercial displays and engineered open-frame assemblies that provide a defined mounting structure. It is not an instruction to drill, clamp, or screw directly into bare LCD glass. Raw panel integration requires the panel maker's mechanical drawing and engineering guidance.
Start With the Complete System, Not a Single Component
The fastest way to create an expensive field problem is to isolate one part of commercial LCD VESA mounting from the rest of the system. Procurement sees a line item; engineering sees interfaces. Build a simple block or cross-section drawing that identifies what generates load, what carries it, what senses it, what can be serviced, and what evidence is visible after installation. The drawing does not need to be a full CAD release to be useful. Its purpose is to make assumptions visible before they become production constraints.
| System element | Role in the design | Why buyers should care |
|---|---|---|
| LCD cell and optical stack | creates the image but tolerates only the mechanical support conditions intended by the panel design | stress that reaches the cell can appear as mura, dark patches, edge light leakage, or permanent damage |
| Internal tray or display chassis | transfers panel and electronics loads into a rigid mechanical structure | a weak or distorted tray can transmit bracket twist toward the panel even when the VESA holes themselves are intact |
| Rear mounting interface | provides threaded inserts, studs, or a plate for the external bracket | its flatness, fastener depth, and local stiffness determine whether installation force is distributed or concentrated |
| VESA bracket or custom mount | connects the display to an arm, wall plate, cabinet, or structural frame | the bracket must support the mass and center of gravity without pulling the display chassis out of plane |
| Building or kiosk structure | ultimately carries static, dynamic, and service loads | a compliant wall plate, thin cabinet panel, or poorly supported arm can make a good display appear mechanically unstable |
| Cables and service loops | apply secondary forces after the display is installed | tight power or HDMI leads can torque connectors, pull one corner of the chassis, or interfere with movement on an articulated arm |
For each element, identify the controlled document that defines it: mechanical drawing, wiring diagram, component datasheet, material specification, software state diagram, installation instruction, or service procedure. If no document owns an interface, the interface is likely to be improvised during assembly or field service. That is exactly where repeatability is usually lost.
Failure Modes: What the Symptom Can Mean and What Evidence to Collect
Troubleshooting should begin with observable evidence, not a favorite theory. Similar symptoms can come from different mechanisms, and the wrong corrective action can hide the evidence or create a second problem. The table below frames common symptoms as investigation paths rather than diagnoses.
| Observed symptom | Possible mechanism | Evidence to collect | Engineering response |
|---|---|---|---|
| Localized mura or pressure marks after installation | mounting force or chassis twist has reached the panel support structure | compare uniform gray/white images before and after loosening the mount under controlled service conditions; inspect bracket contact and chassis gaps | correct the load path rather than compensating with image settings |
| Display sits visibly twisted or bezel gaps change | bracket, wall plate, cabinet surface, or rear chassis is not planar | use straightedge/fixture checks on the mounting surfaces and compare corner stand-off without forcing the assembly flat | shim or redesign the structural interface according to the mechanical drawing instead of pulling it into shape with screws |
| Fasteners bottom out before the bracket is clamped | screw length exceeds the usable thread depth or spacers are missing | check the specified screw engagement and inspect witness marks; do not infer safe depth from the external hole alone | use the hardware stack defined for the exact display and bracket |
| Loose mount after transport or repeated arm movement | fastener preload, locking method, bracket stiffness, or vibration environment is inadequate | record fastener state and visible motion during a controlled movement test; inspect for elongated holes or fretting | review locking hardware and structural stiffness with the mechanical supplier |
| Intermittent video or power faults after the screen is positioned | cable strain is transferred to connectors when the bracket moves | observe connector and cable movement through the full service range and compare faults with cable position | add retention and service loops so connectors are not structural members |
| Crack or permanent panel damage | excessive point load, impact, frame deformation, or direct pressure has exceeded the assembly tolerance | quarantine the unit and document the mechanical state; do not continue tightening or operating a visibly damaged panel | treat as a mechanical failure investigation and review installation process, bracket contact, and handling |
A key discipline is to preserve the as-failed state long enough to record it. Photograph the physical condition, capture available logs, note ambient and operating state, and record the exact configuration. If the first response is to tighten hardware, reboot the computer, replace a cable, clean a filter, or disable an alarm, the project may lose the only evidence that distinguishes a design weakness from a one-off assembly error.
Design Controls That Prevent the Problem From Becoming a Field Routine
Use the manufacturer's mechanical drawing as the controlling interface document
It should define mounting-hole location, orientation limits, keep-out areas, overall mass, and any hardware constraints. A generic VESA label does not replace a model-specific drawing.
Useful project evidence: Controlled drawing revision attached to the RFQ and installation work instruction. This evidence should be tied to a drawing, BOM, software revision, or test configuration so it can be reproduced on later production units.
Keep the load path through the metal structure, not through the LCD glass
A bracket should react against the intended chassis or mounting plate. Direct pressure on glass edges or an unsupported optical stack can create concentrated stress.
Useful project evidence: Cross-section drawing or assembly review showing which parts carry clamp force. This evidence should be tied to a drawing, BOM, software revision, or test configuration so it can be reproduced on later production units.
Control screw engagement and hardware stack
Screw diameter, length, washers, spacers, and thread engagement must match the display and bracket. A screw that is too long can bottom internally; one that is too short may not provide sufficient engagement.
Useful project evidence: Approved fastener BOM and sample-build verification. This evidence should be tied to a drawing, BOM, software revision, or test configuration so it can be reproduced on later production units.
Check bracket flatness and cabinet stiffness
A rigid display bolted to a warped plate may be forced to follow the plate. The same risk exists when a thin kiosk wall is used as the only mounting structure.
Useful project evidence: Mounting-surface inspection and deflection check with the real load. This evidence should be tied to a drawing, BOM, software revision, or test configuration so it can be reproduced on later production units.
Account for center of gravity and service motion
Articulated arms and pull-out service trays create moments that are different from a static wall mount. Cable bundles can add asymmetric load.
Useful project evidence: Worst-position mechanical check with all production peripherals and cables installed. This evidence should be tied to a drawing, BOM, software revision, or test configuration so it can be reproduced on later production units.
Preserve thermal and ventilation clearances
A mechanically convenient bracket can still block vents or change convection around the display. Mechanical acceptance should therefore include the thermal clearances required by the display design.
Useful project evidence: Installation drawing with keep-out zones and post-install temperature evidence. This evidence should be tied to a drawing, BOM, software revision, or test configuration so it can be reproduced on later production units.
Common Mistakes to Eliminate Before Pilot Build
Many failures are created by decisions that seem harmless because the unit still powers on during a short bench demonstration. Remove these habits from drawings, work instructions, and acceptance criteria before the pilot build:
- Choosing a bracket only by screen diagonal instead of the exact mounting drawing
- Using mounting screws to pull a warped cabinet surface flat
- Adding thick washers or spacers without checking thread engagement and vent clearance
- Routing stiff power/video cables so they push on one side of the chassis
- Judging success only by whether the screen turns on
- Failing to repeat the visual uniformity check after service reinstallation
The common pattern is uncontrolled substitution. A different screw, filter, film, thermal pad, sensor, cable route, bracket, or software setting can preserve basic functionality while changing reliability. When the item affects the mechanism described in this guide, treat it as an engineering change and decide whether regression testing is needed.

Build an Acceptance Test That Reproduces the Production Configuration
A useful commercial LCD VESA mounting acceptance test is not a generic power-on check. It reproduces the mounting, enclosure, player or computer load, cabling, peripherals, materials, environmental boundary, and service steps that the buyer will actually deploy. The goal is not to create an artificially severe laboratory stunt. The goal is to prove that ordinary installation and credible fault conditions lead to deterministic behavior.
| Test stage | Method | Pass evidence |
|---|---|---|
| Incoming mechanical baseline | Photograph bezel gaps, rear chassis, mounting inserts, and a uniform test image before installation. | Creates evidence that separates shipping damage from installation-induced change. |
| Bracket dry fit | Assemble the bracket and required spacers without forcing the display into a warped support. | Bracket contacts uniformly and no fastener bottoms before clamping. |
| Fastener verification | Confirm specified hardware, engagement, and any supplier-provided tightening method. | Hardware matches the controlled BOM; no improvisation with longer screws. |
| Uniformity check | Display black, dark gray, mid-gray, white, and representative content after mounting. | No new pressure marks, bright/dark patches, edge leakage, or line defects attributable to the mount. |
| Full-position movement test | Move articulated or service mounts through the intended range while watching cables and chassis motion. | No connector loading, cable pinch, collision, or visible chassis twist. |
| Thermal operating check | Run representative content and operating load in the final mounting orientation. | Vent paths remain open and temperatures stay within the selected product's specified limits. |
| Post-soak reinspection | Repeat visual and mechanical checks after the assembly has reached stable operating temperature and after power cycling. | No new optical stress or loosening appears as materials warm and cool. |
| Service reinstall regression | Remove and reinstall the screen using the field procedure. | A trained technician can restore the same mechanical state without special improvised steps. |
Record the test setup with photographs and revision identifiers. If a later unit fails, the team should be able to answer whether it matches the tested build. A pass statement with no configuration is weak evidence because the same display or kiosk can behave differently after a panel, enclosure, PSU, player, sensor, material, or firmware substitution.
Pilot the Design Before Fleet Rollout
Run a small pilot using production hardware, production software, and the intended installation method. The pilot should exercise the day-to-day states that matter to commercial LCD VESA mounting: cold start, normal operating load, scheduled operation, service access, power recovery, network recovery where applicable, and representative environmental variation. Keep the pilot long enough to reveal intermittent behavior that a short factory demonstration may miss, but do not convert pilot duration into an unsupported lifetime prediction.
Create an exception log rather than a success-only report. For each anomaly, record unit identity, time, configuration, starting state, action, visible symptom, sensor/log evidence, recovery, and whether the event was reproducible. This log becomes the basis for design changes and the field runbook. It also prevents different teams from using the same word-such as overheating, stress, aging, tamper, or failure-to describe completely different evidence.
Change Control: Keep a Known-Good Configuration Known
Once the pilot passes, freeze the interfaces that materially affect commercial LCD VESA mounting. A cosmetic enclosure revision can change stiffness or heat rejection. A new adhesive or film can change optics. A replacement computer can change power density. A new sensor bracket can change switch travel. A software update can change workload or event handling. Change control does not mean refusing improvements; it means deciding which changes require a repeat of part or all of the acceptance plan.
Keep the baseline tied to part numbers, drawings, firmware/software versions, and installation instructions. When a supplier proposes an equivalent component, request the characteristics that matter to the function rather than accepting the word "equivalent" alone. For field replacement, define which items are plug-compatible and which need a regression check before the kiosk or display returns to service.
Write the Requirement Into the RFQ
A strong RFQ describes the operating scenario, required evidence, and acceptance method. It avoids unsupported design prescriptions where the supplier may have a better implementation, but it also avoids vague checkboxes such as "industrial grade," "UV resistant," "fanless," "VESA compatible," or "tamper proof." Ask what configuration was actually tested and how the supplier will keep production aligned with it.
- Provide the controlled mechanical drawing for the proposed display configuration.
- Identify the mounting pattern and any orientation restrictions that apply to the complete assembly.
- State the approved fastener size, usable engagement, spacer requirements, and any tightening guidance the supplier can support.
- Provide overall mass and, when relevant to an arm or pull-out tray, center-of-gravity information.
- Identify rear-surface areas that must remain clear for ventilation, connectors, speakers, or service access.
- Explain whether the VESA interface is carried by the main chassis or a secondary rear cover.
- Provide an installation sample or fixture for custom brackets before volume tooling is frozen.
- Define packaging or transport restraints when the display ships already mounted in a kiosk or cabinet.
- Agree on an optical-uniformity and mechanical acceptance test after final assembly.
- Use engineering change control for changes to chassis, bracket, mounting inserts, cover glass, or panel model.
Troubleshooting and Field Service Runbook
Field teams should have a short runbook for commercial LCD VESA mounting. First verify the unit identity and current BOM/software revision. Second capture the symptom before changing the state. Third compare the physical installation with the approved photo or drawing. Fourth check available sensor or event logs. Fifth isolate the smallest change that reproduces the problem. Finally, after repair, repeat the relevant acceptance step instead of declaring success as soon as the screen or kiosk appears normal.
The runbook should also tell technicians what not to do. Do not improvise hardware lengths, bypass a sensor permanently, add dense filter media, introduce unapproved optical films, disturb thermal interface materials, or force a warped assembly into position unless an engineering instruction authorizes the change. Those actions can temporarily remove a symptom while making the fleet harder to support.
FAQ
Q: Can any VESA-compatible bracket be used on a commercial LCD?
A: Not automatically. Hole-pattern compatibility is only one condition. The bracket must also support the display mass and center of gravity, use the correct hardware stack, preserve ventilation and connector access, and avoid distorting the display chassis.
Q: Why can an LCD show pressure marks even when nobody touched the front glass?
A: Rear-chassis twist or an uneven mounting interface can transmit stress through the mechanical stack. The symptom may appear on uniform gray or dark images even though the front surface was never pressed directly.
Q: Should installers tighten mounting screws as much as possible?
A: No. The correct method is the one defined by the display and mounting hardware documentation. Excessive tightening can distort parts, while insufficient engagement can create retention risk. Do not invent a torque value when the supplier has not specified one.
Q: Is a custom cabinet mount better than VESA?
A: Either can work. A custom frame can improve depth, cable routing, and service access, while a standard VESA interface simplifies compatibility. The important question is whether the chosen structure creates a stable, flat, serviceable load path.
Q: What is the best acceptance image for finding mechanical stress?
A: Uniform black, gray, and white fields are useful because localized pressure artifacts are easier to see than in busy advertising content. Use them as part of a controlled visual check, not as a substitute for the panel maker's inspection criteria.
Final Procurement Perspective
The best way to manage commercial LCD VESA mounting is to turn it from an informal feature into a controlled system behavior. Map the complete path, identify failure mechanisms, protect the interfaces that matter, validate the actual production configuration, preserve evidence, and make service/change control part of the design. This approach gives procurement, engineering, installation, and operations the same definition of "acceptable" before a volume order is placed.
For LEGOYO projects, the article should be used as a planning framework rather than as a statement that every product automatically includes every feature described. Confirm the selected model, customization, environmental requirement, and test evidence with the project team before freezing the specification.